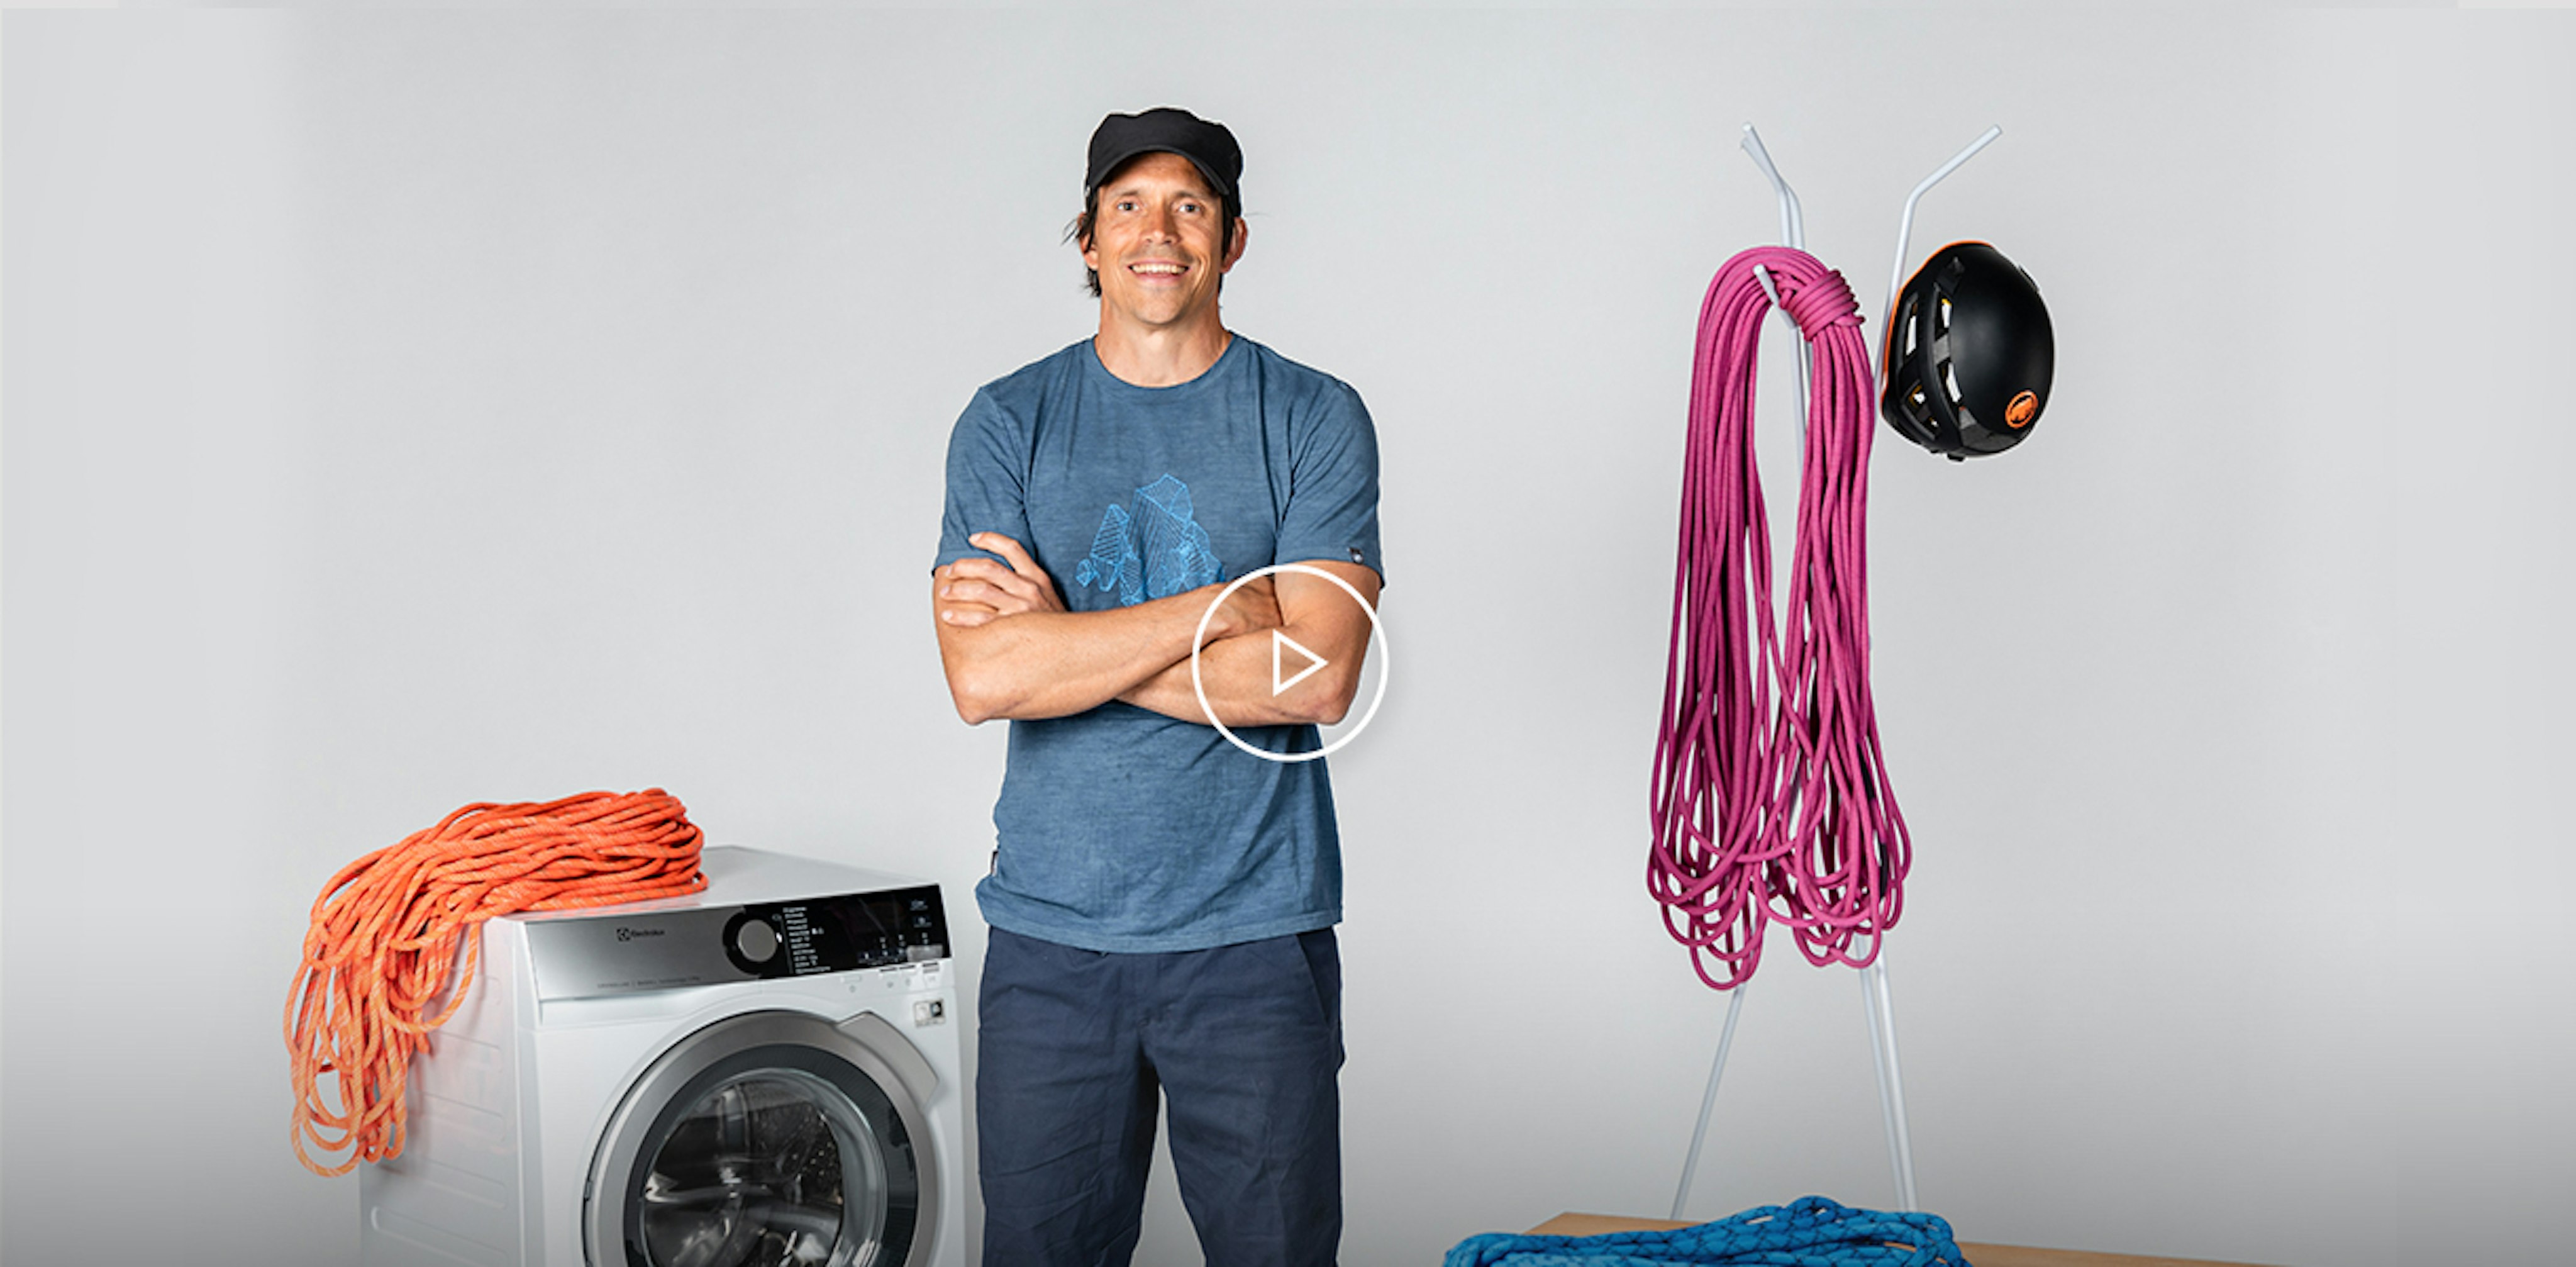
Ropes
Ropes. The part of an adventurer’s gear that is approached with much caution – and rightly so. This can be the thing that your life depends on, so you want to be sure that it's ready for whatever your climb may have in store for you. That’s why proper rope care will help put your mind at ease - and your trust in your rope.
The below guide from our expert team is broken into four main sections, diving deep on common queries our team receives when it comes to rope care. These are:
Making the decision to retire your ropes can be difficult, especially if you’re unsure what signs to look for. Sometimes a rope may look great and be compromised, while other times a rope that you’ve had for years still has life in it. To help, we’ve boiled it down to a few simple steps and guidelines to help you know when it’s time to say goodbye.
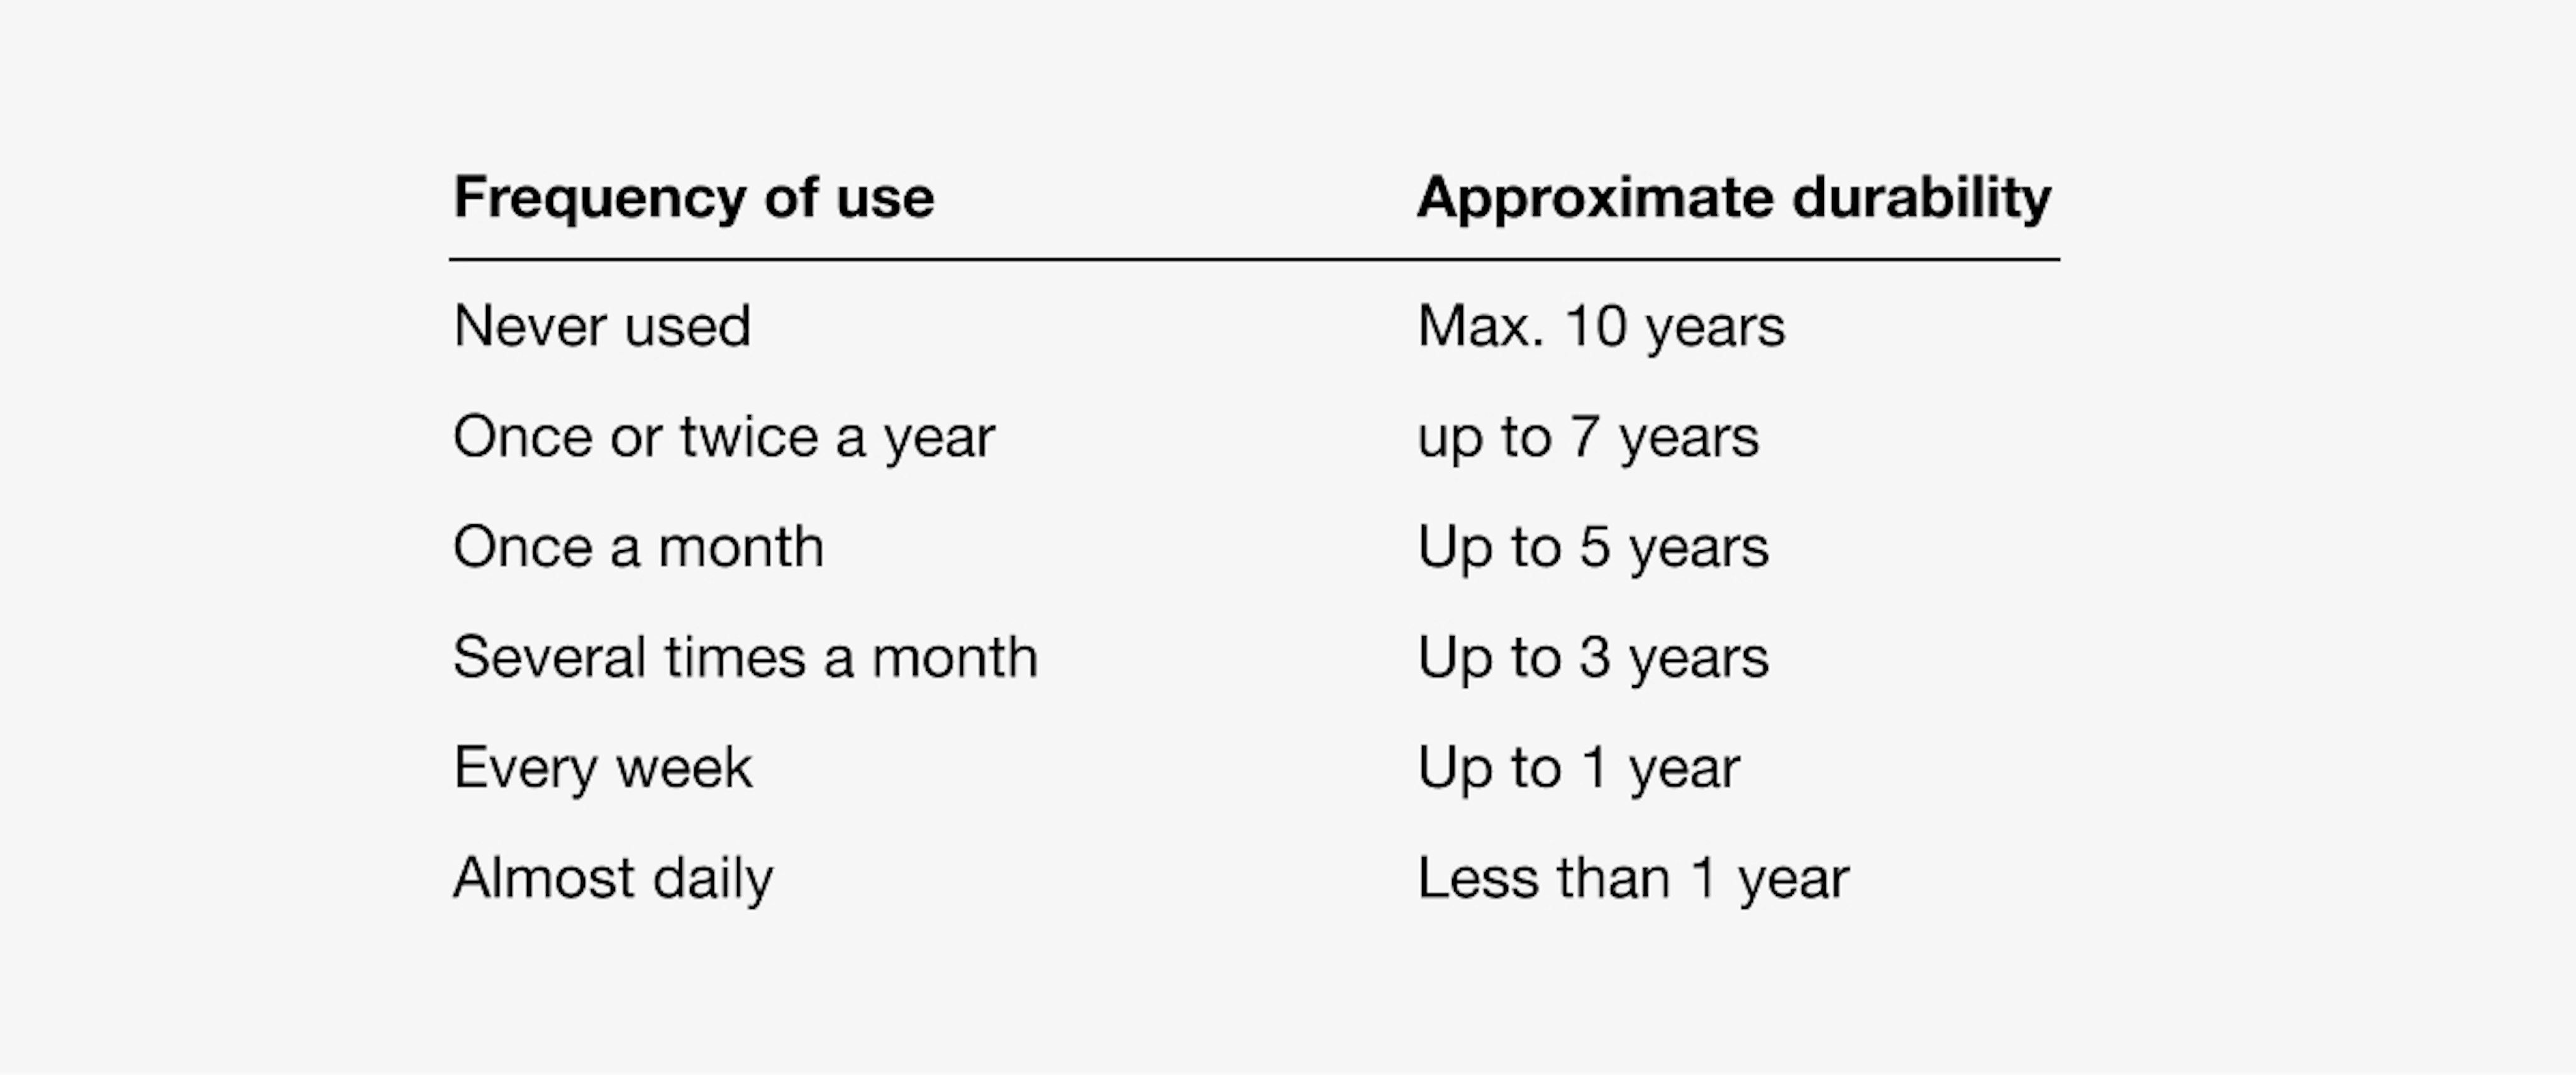
1.1 Lifespan based on frequency of use
Many factors play into your rope’s lifespan. As a rule of thumb, however, the below table offers a loose indication of how long it will last based on frequency of use. If you’re not sure how old your rope is, the production year should be printed on the end of the rope itself, as well as on the packaging. Dates fade over time, so we recommend writing down the date you purchased it for later reference. You can also write it on the rope itself, and refresh it for clarity when needed.
1.2 Check the rope by look and feel
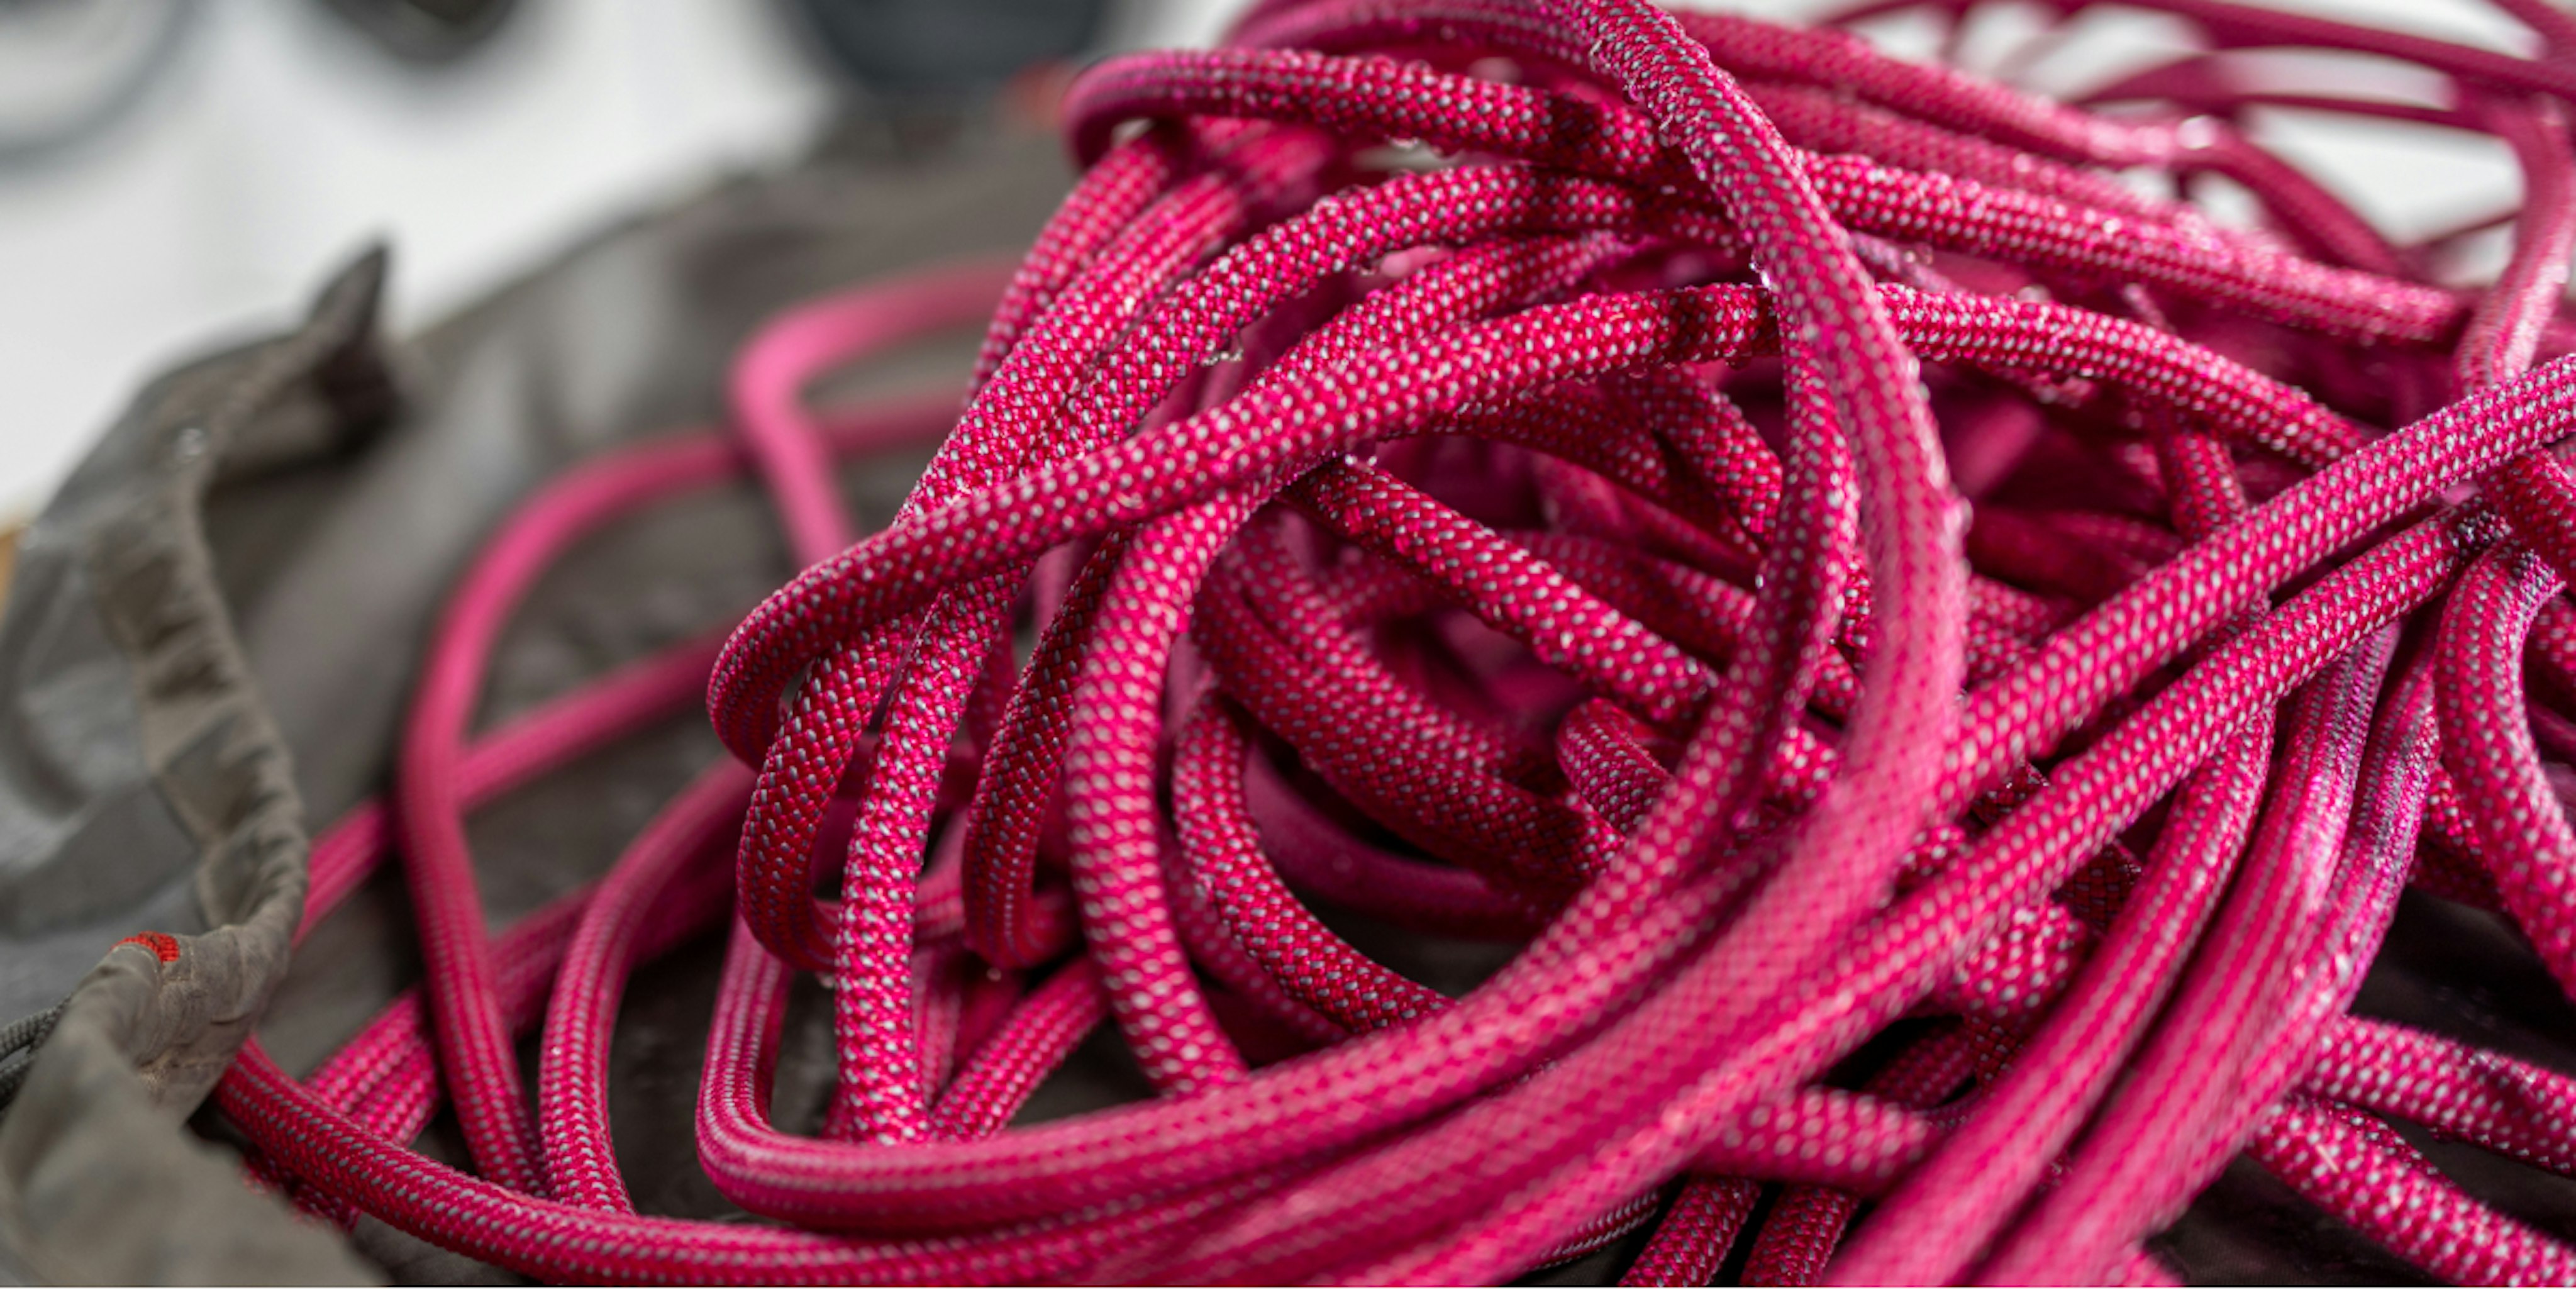
Ropes should be checked regularly before use. The best way to do this is to pull the entire rope through your hand, feeling and looking for signs of wear, such as:
- obvious cuts
- places where the rope is much thicker than normal
- parts where the rope feels stiff or super soft
- areas where discoloring has occurred
- places where the sheath is damaged, and the rope’s core is visible.
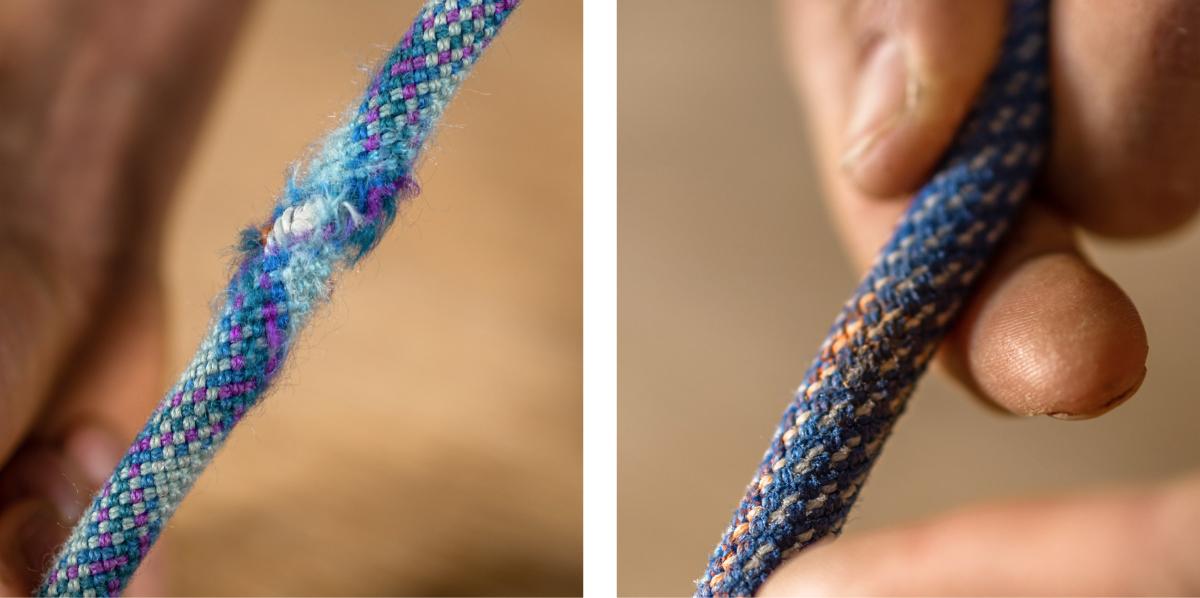
If any of these signs are found in the middle of the rope, then it’s time to retire it. If the damage is at or near the ends of the rope, then you can cut it for continued use, which we explain more in Part 2 below.
Note: Slightly “fuzzy” areas on ropes are normal but you should keep an eye on them and check them before each use.
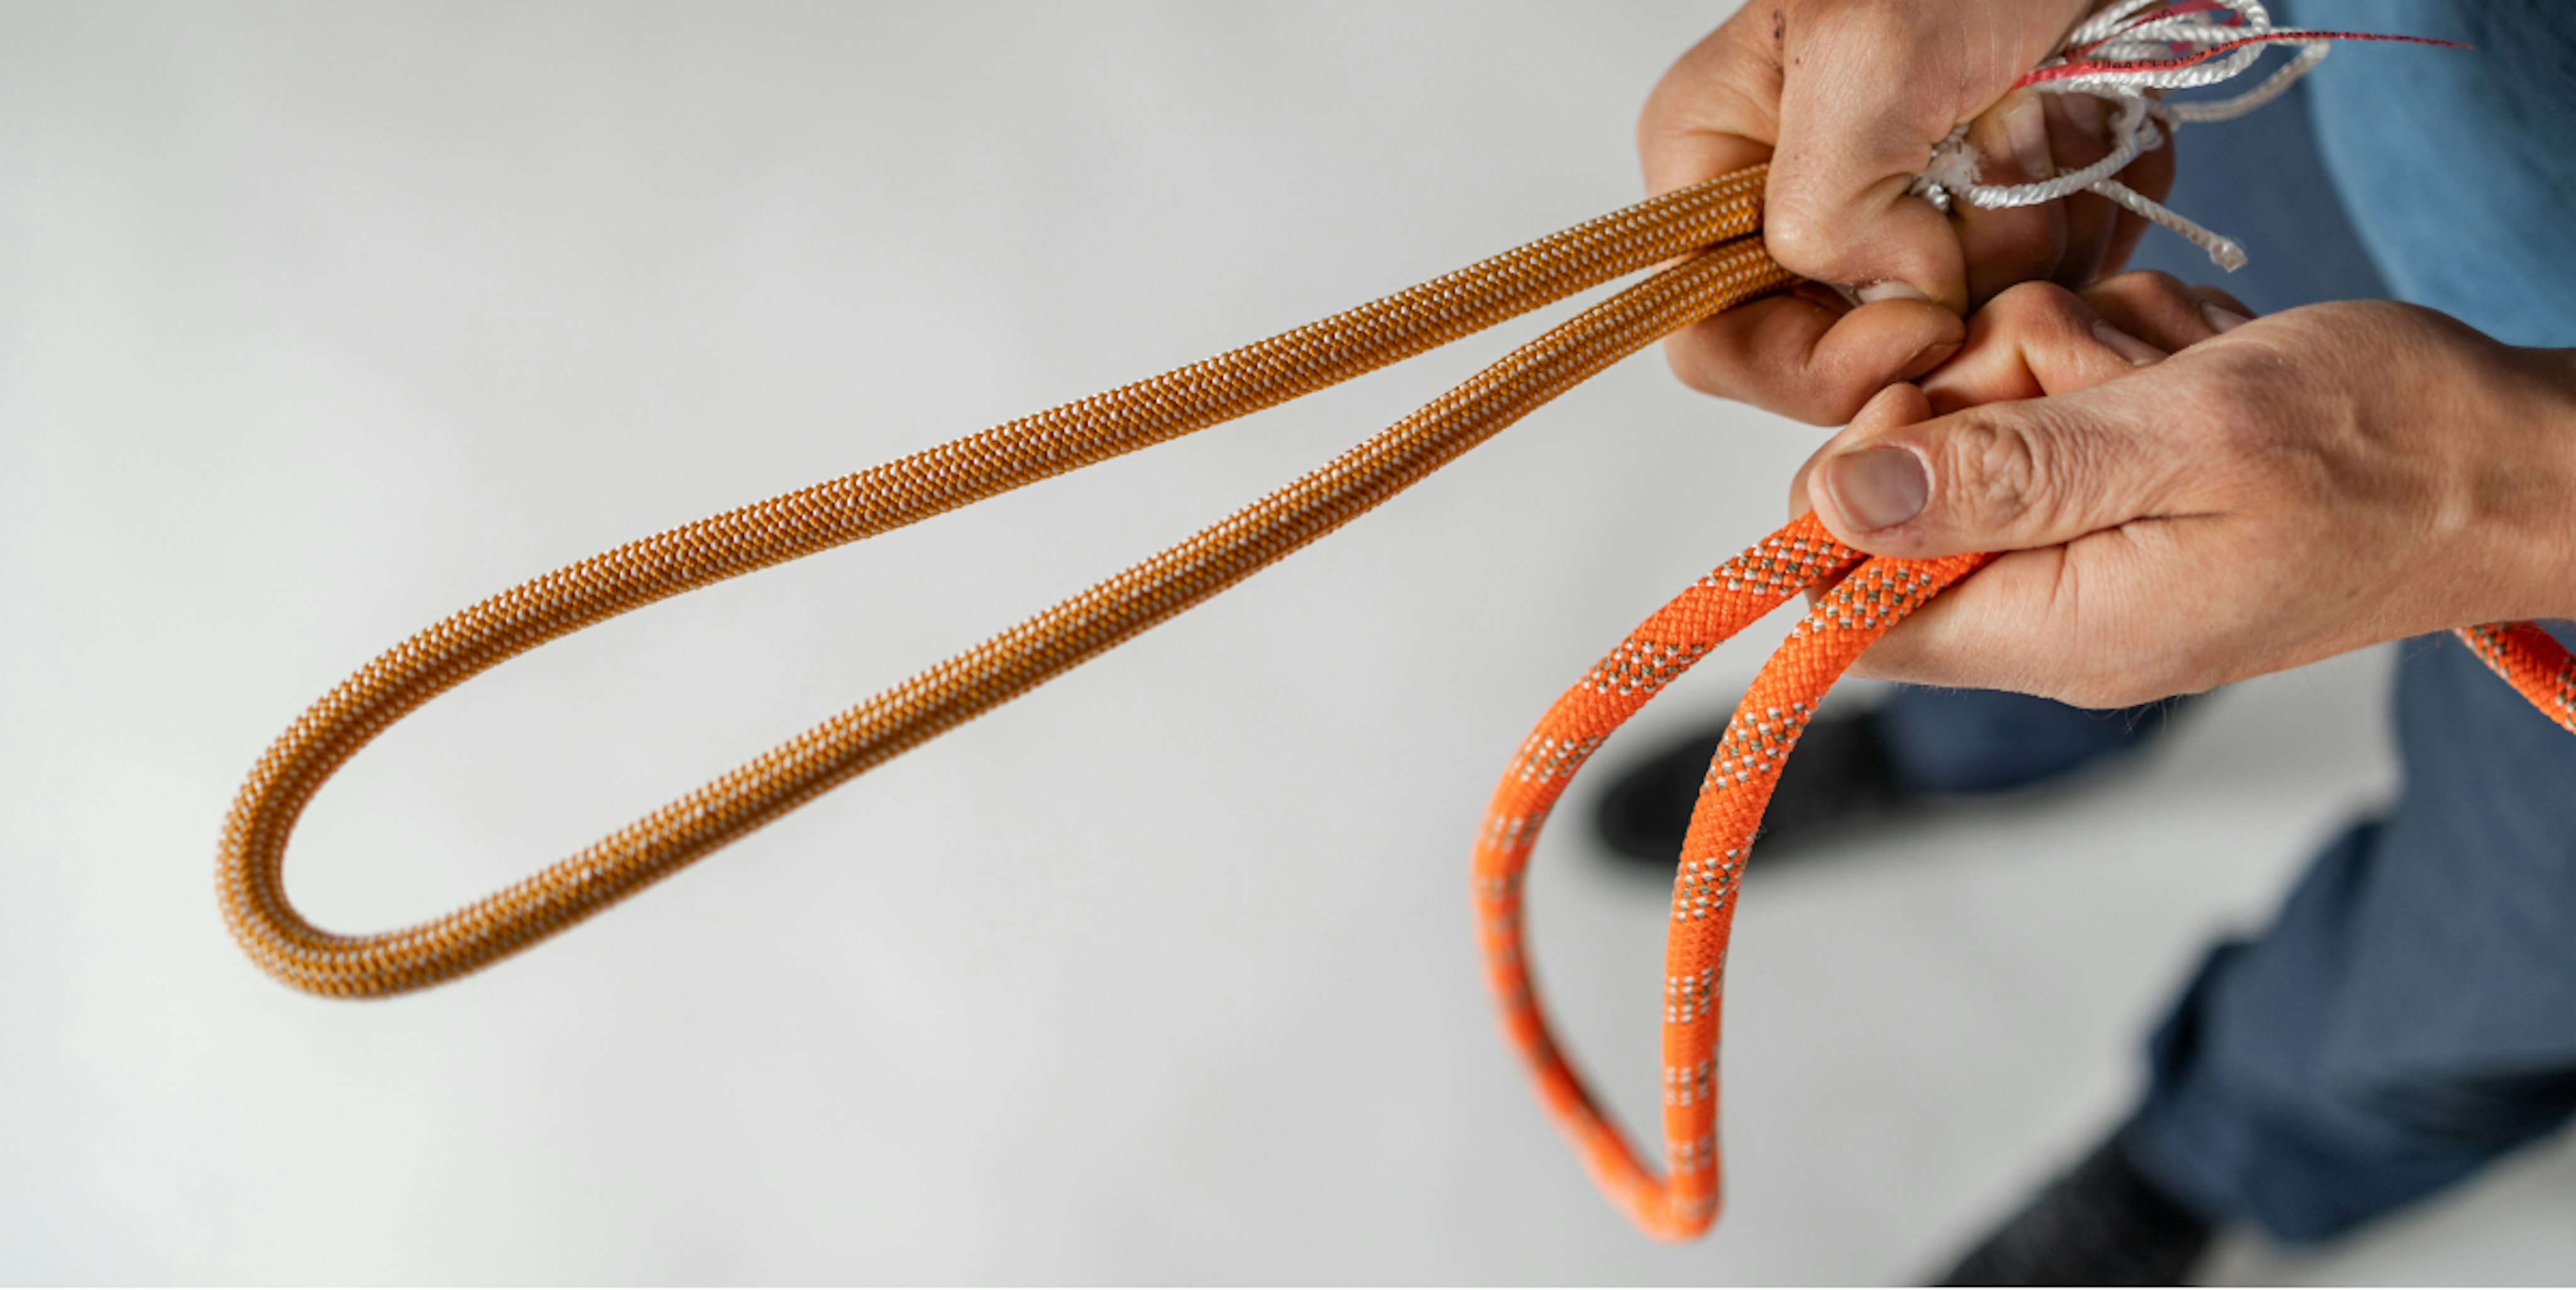
1.3 Resistance and elasticity tests
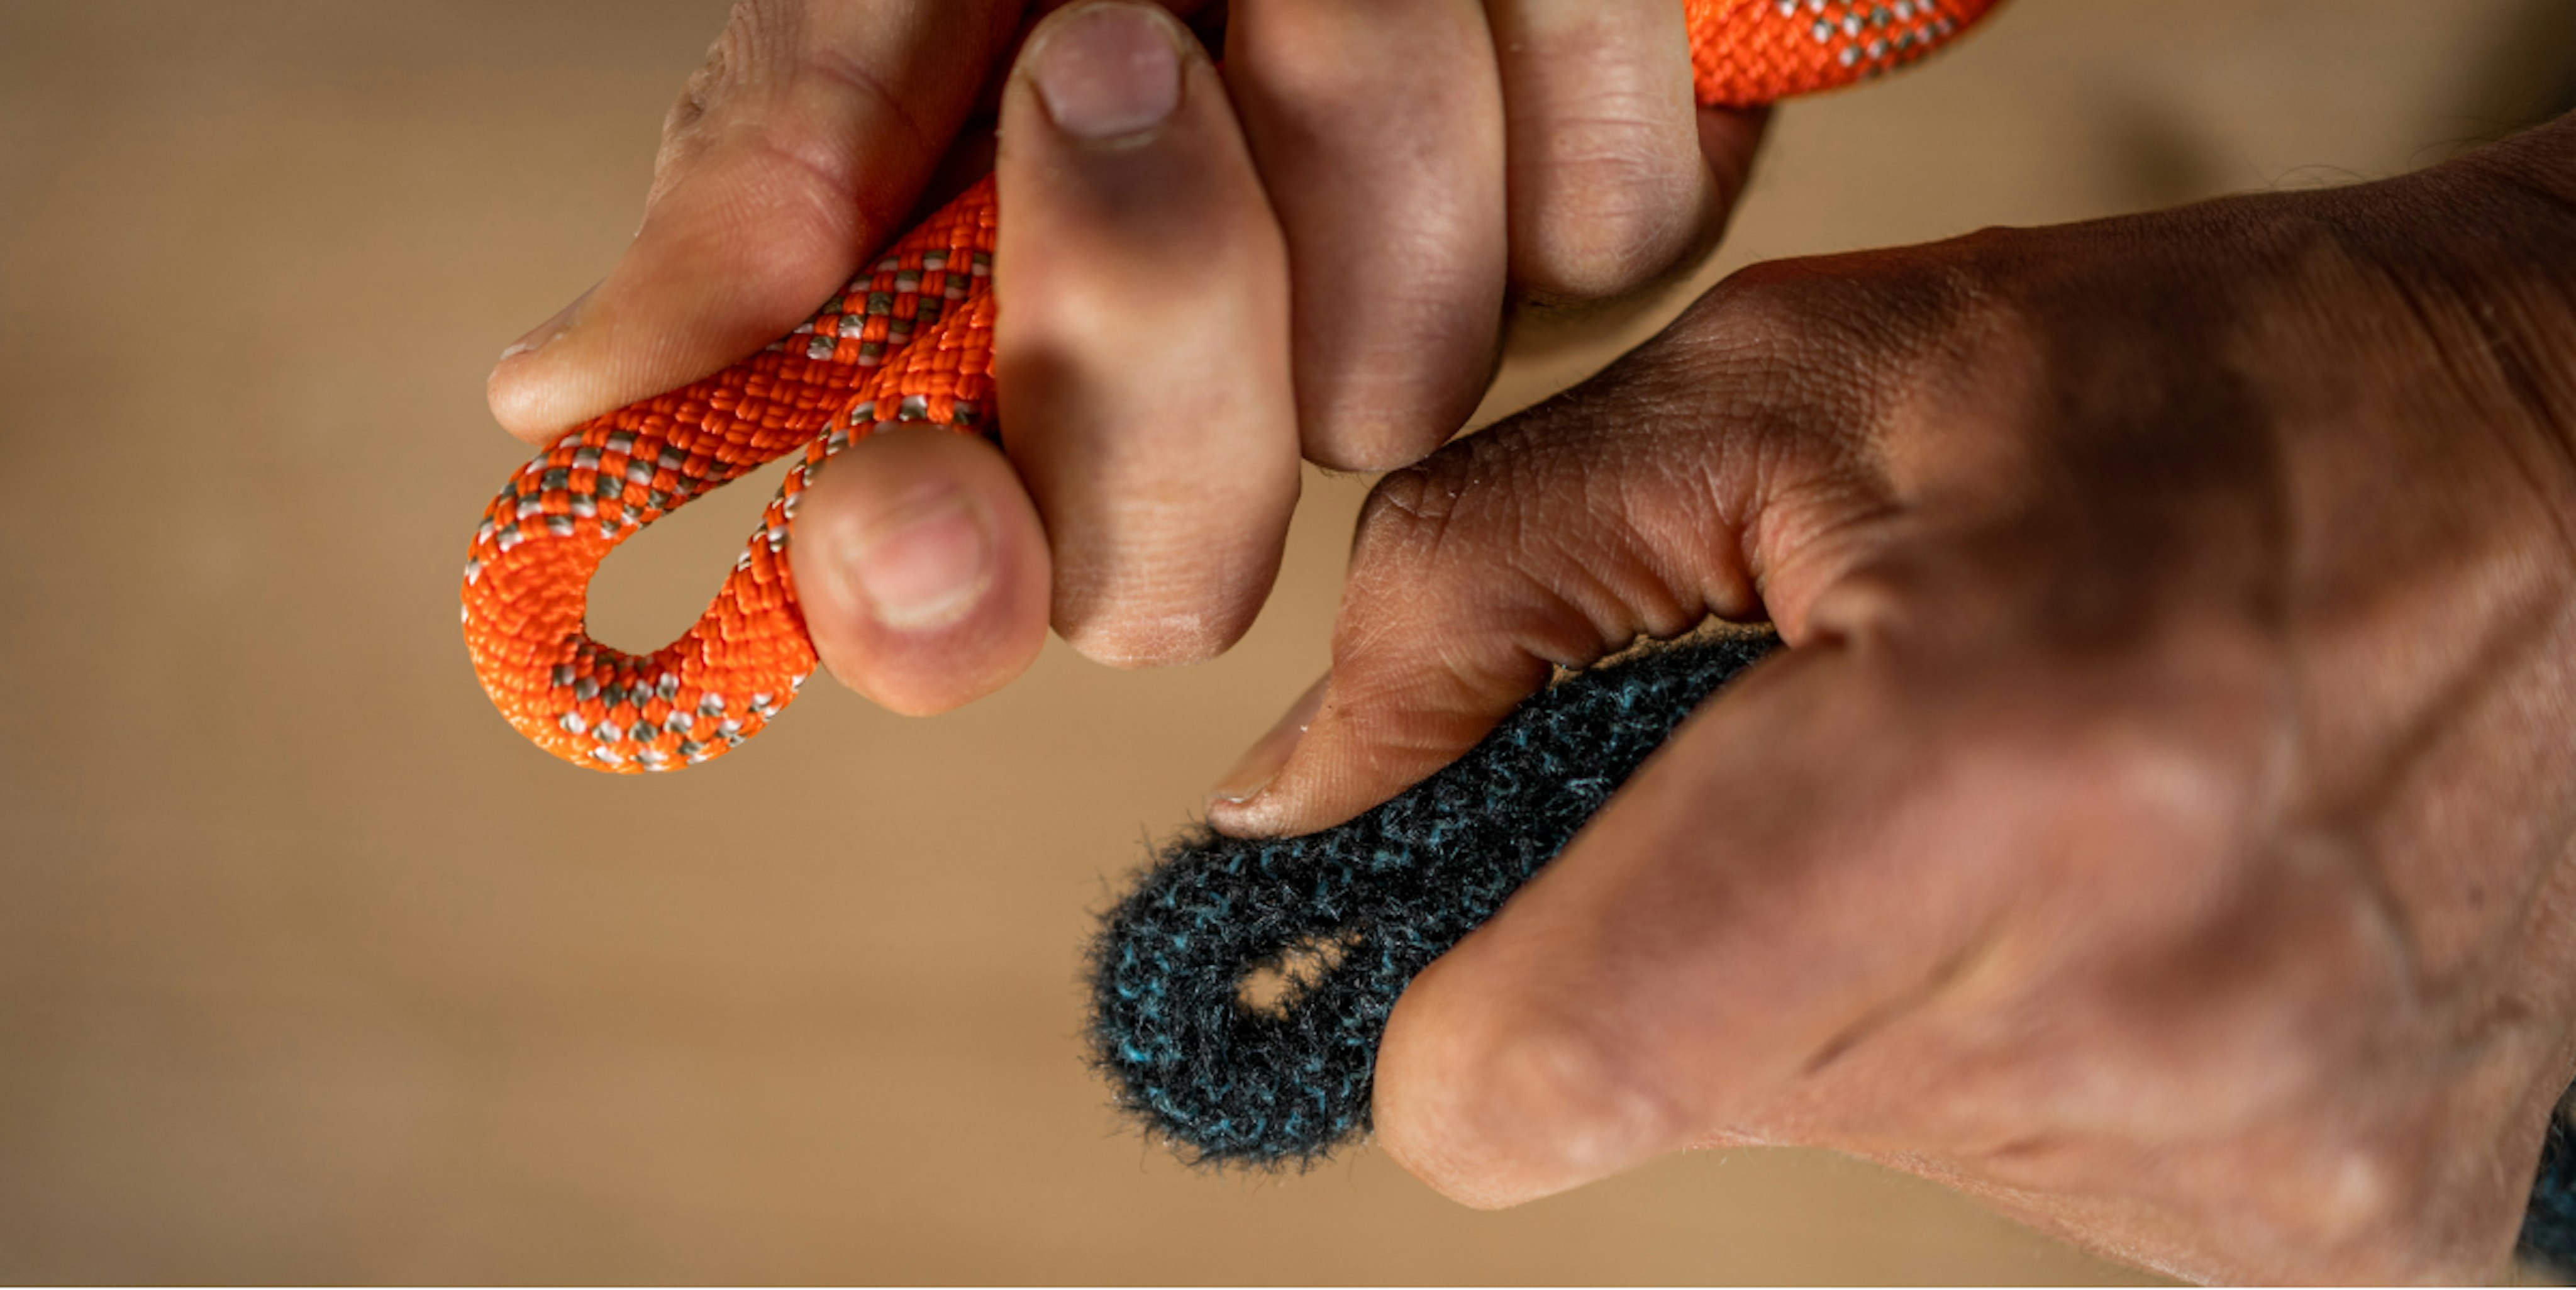
Another way to see if a rope is performing as it should be is to make a simple loop and apply pressure. If it shows resistance and “bounce” at the loop, you are good to go. If the loop collapses, the rope’s structure is too damaged to continue to use safely.
As mentioned above, damage to a rope doesn’t always mean it should be retired straight away. One method to keep an otherwise compromised rope going strongly and safely again is by cutting it – a less daunting challenge than you may imagine.
2.1 Check for damage/test rope
The first thing to do is make sure your rope actually needs to be cut, or if it should be retired. For that we recommend reading the above section if you skipped it or watching our video on when to retire your rope, as it has some tests to do that will help you know if your rope may be damaged beyond repair. It also should be mentioned that a rope should not be cut at, or close to, the middle because it becomes too short for climbing. If this is where the damage is, better instead to retire the rope from use.
2.2 Gather the right tools
With step 1 done, you can go about cutting your rope with confidence. To do so you will need the following:
- Rope
- Heat cutter / Sharp knife
- Tape
- Lighter
- Edding 3000 pen
We know that not all of you will have a heat cutter handy, but if you do have a climbing gym close by, they often have these devices on location and may be able to cut the rope for you. For everyone else, follow the steps below.
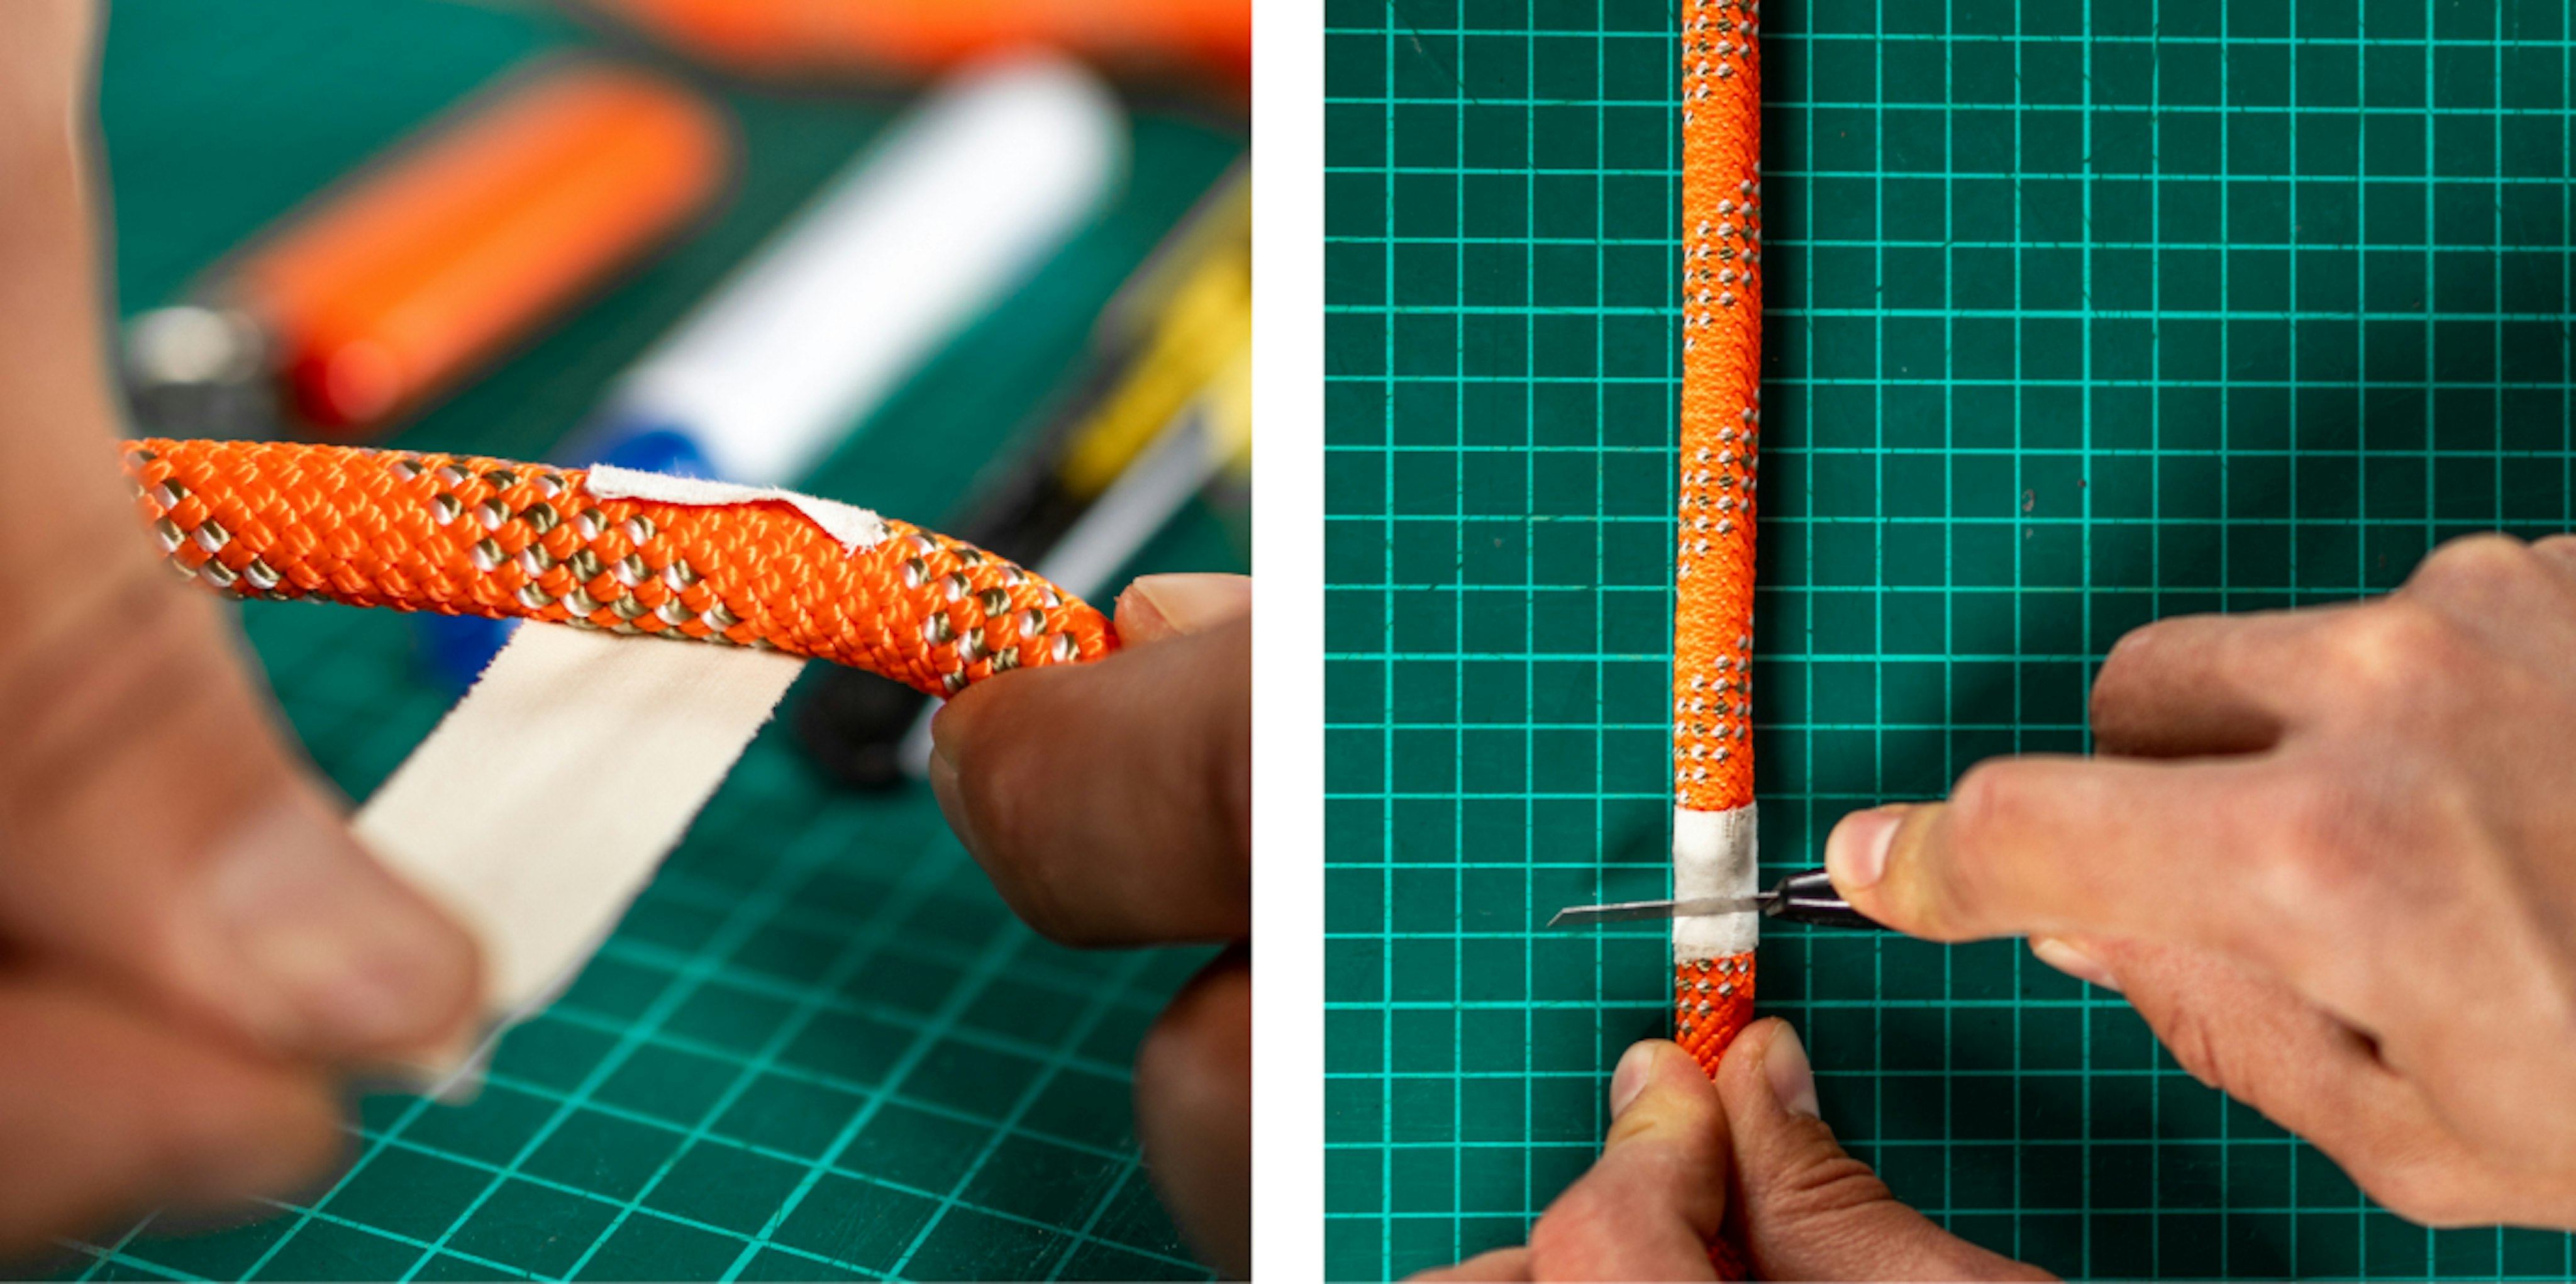
2.3 Tape off the damage and cut
Take the tape and use it to mark the area you want to cut out. Take your knife and cut out and away either side of the damaged part within your taped section as cleanly as possible.
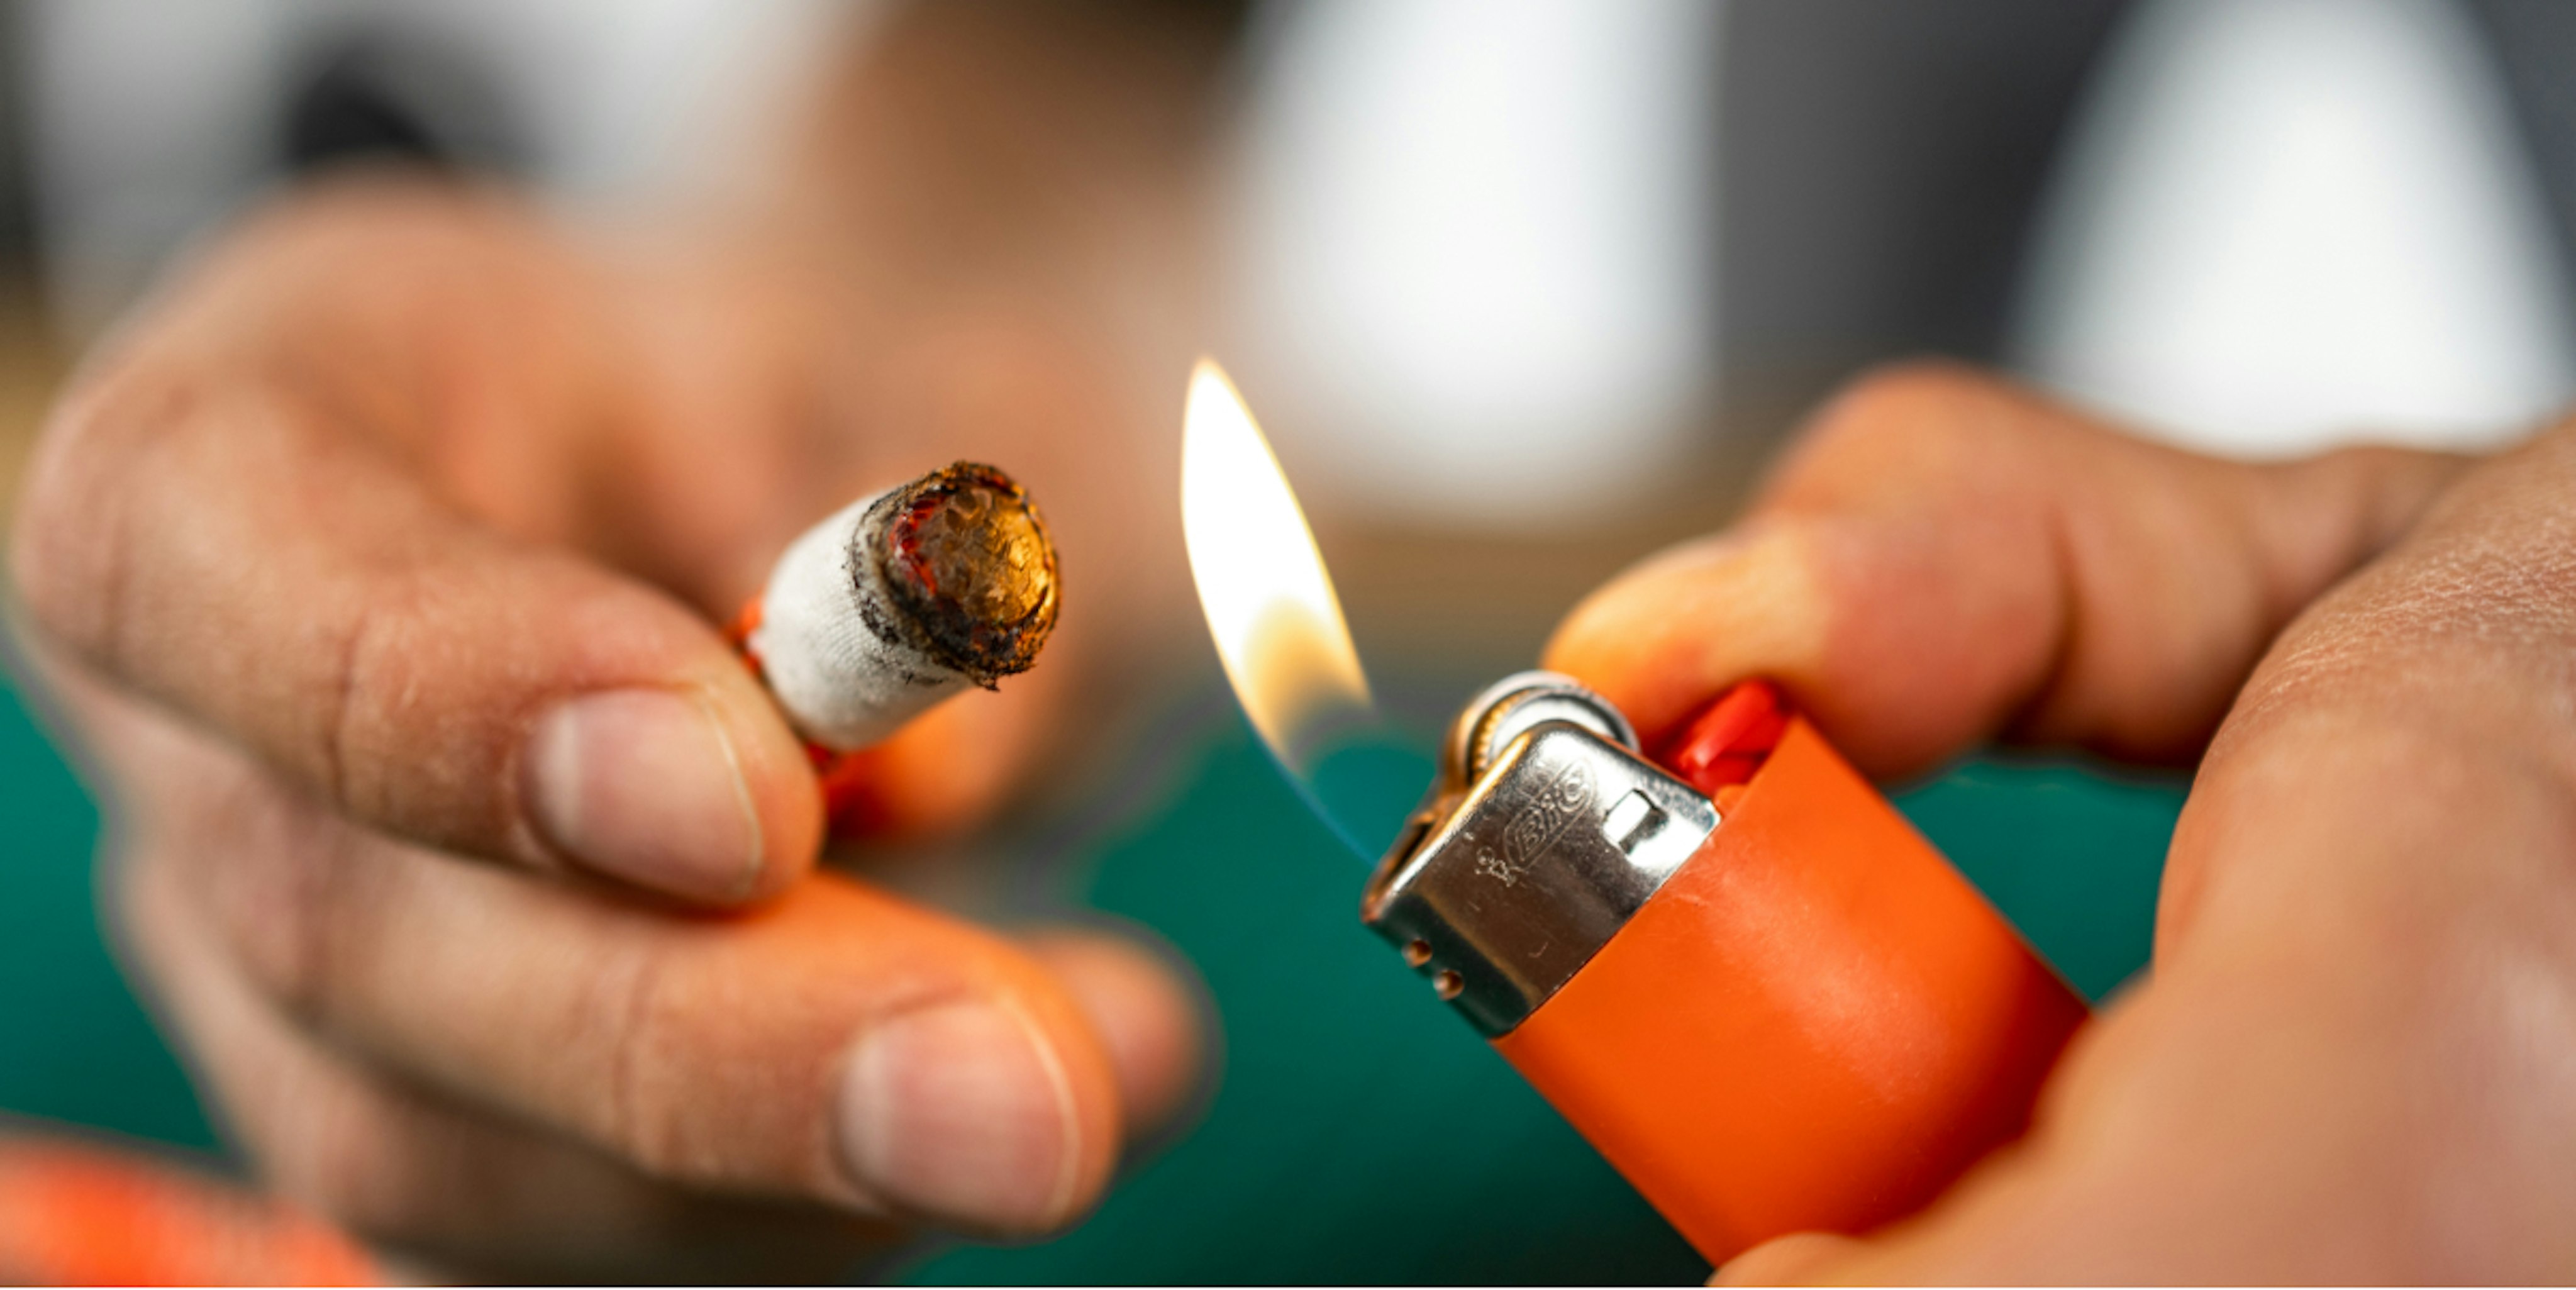
2.4 Melt core and sheaths together
With the damage removed, you now want to fuse the core and sheaths together. Use your lighter for this. Hold the flame at the cut for a few seconds until you see it melting together and they are bound.
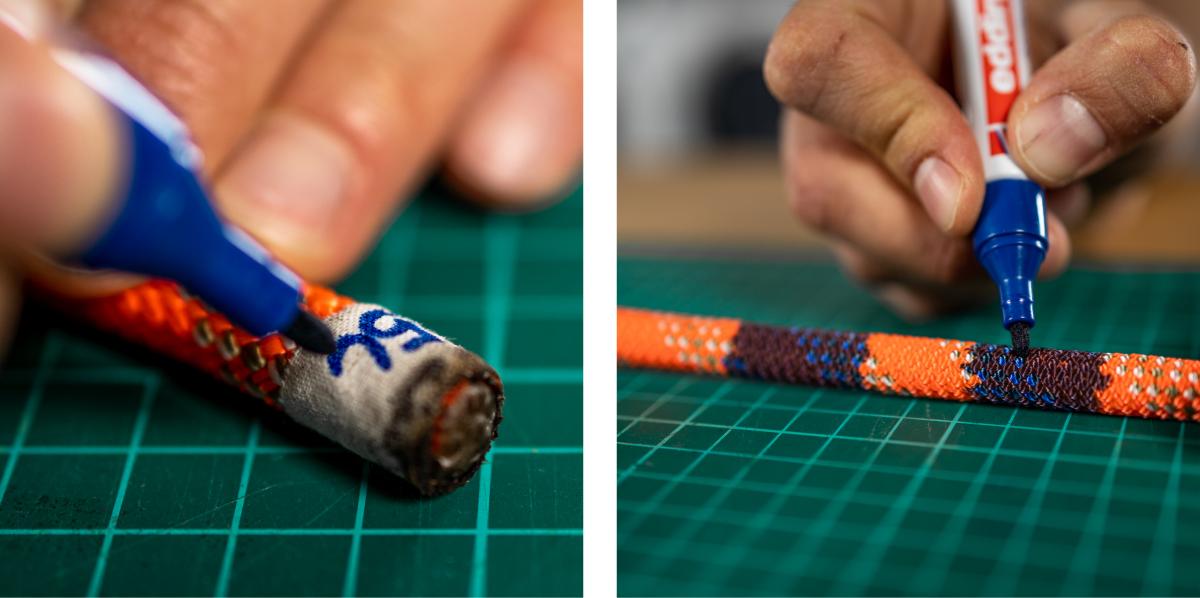
2.5 Write new middle and length
Finally, measure your rope and mark using your Edding 3000 pen the middle point of the rope, as well as writing on the tape where you made the cut the new length. We recommend Edding 3000 as it has been tested to last while not compromising your rope in any way.
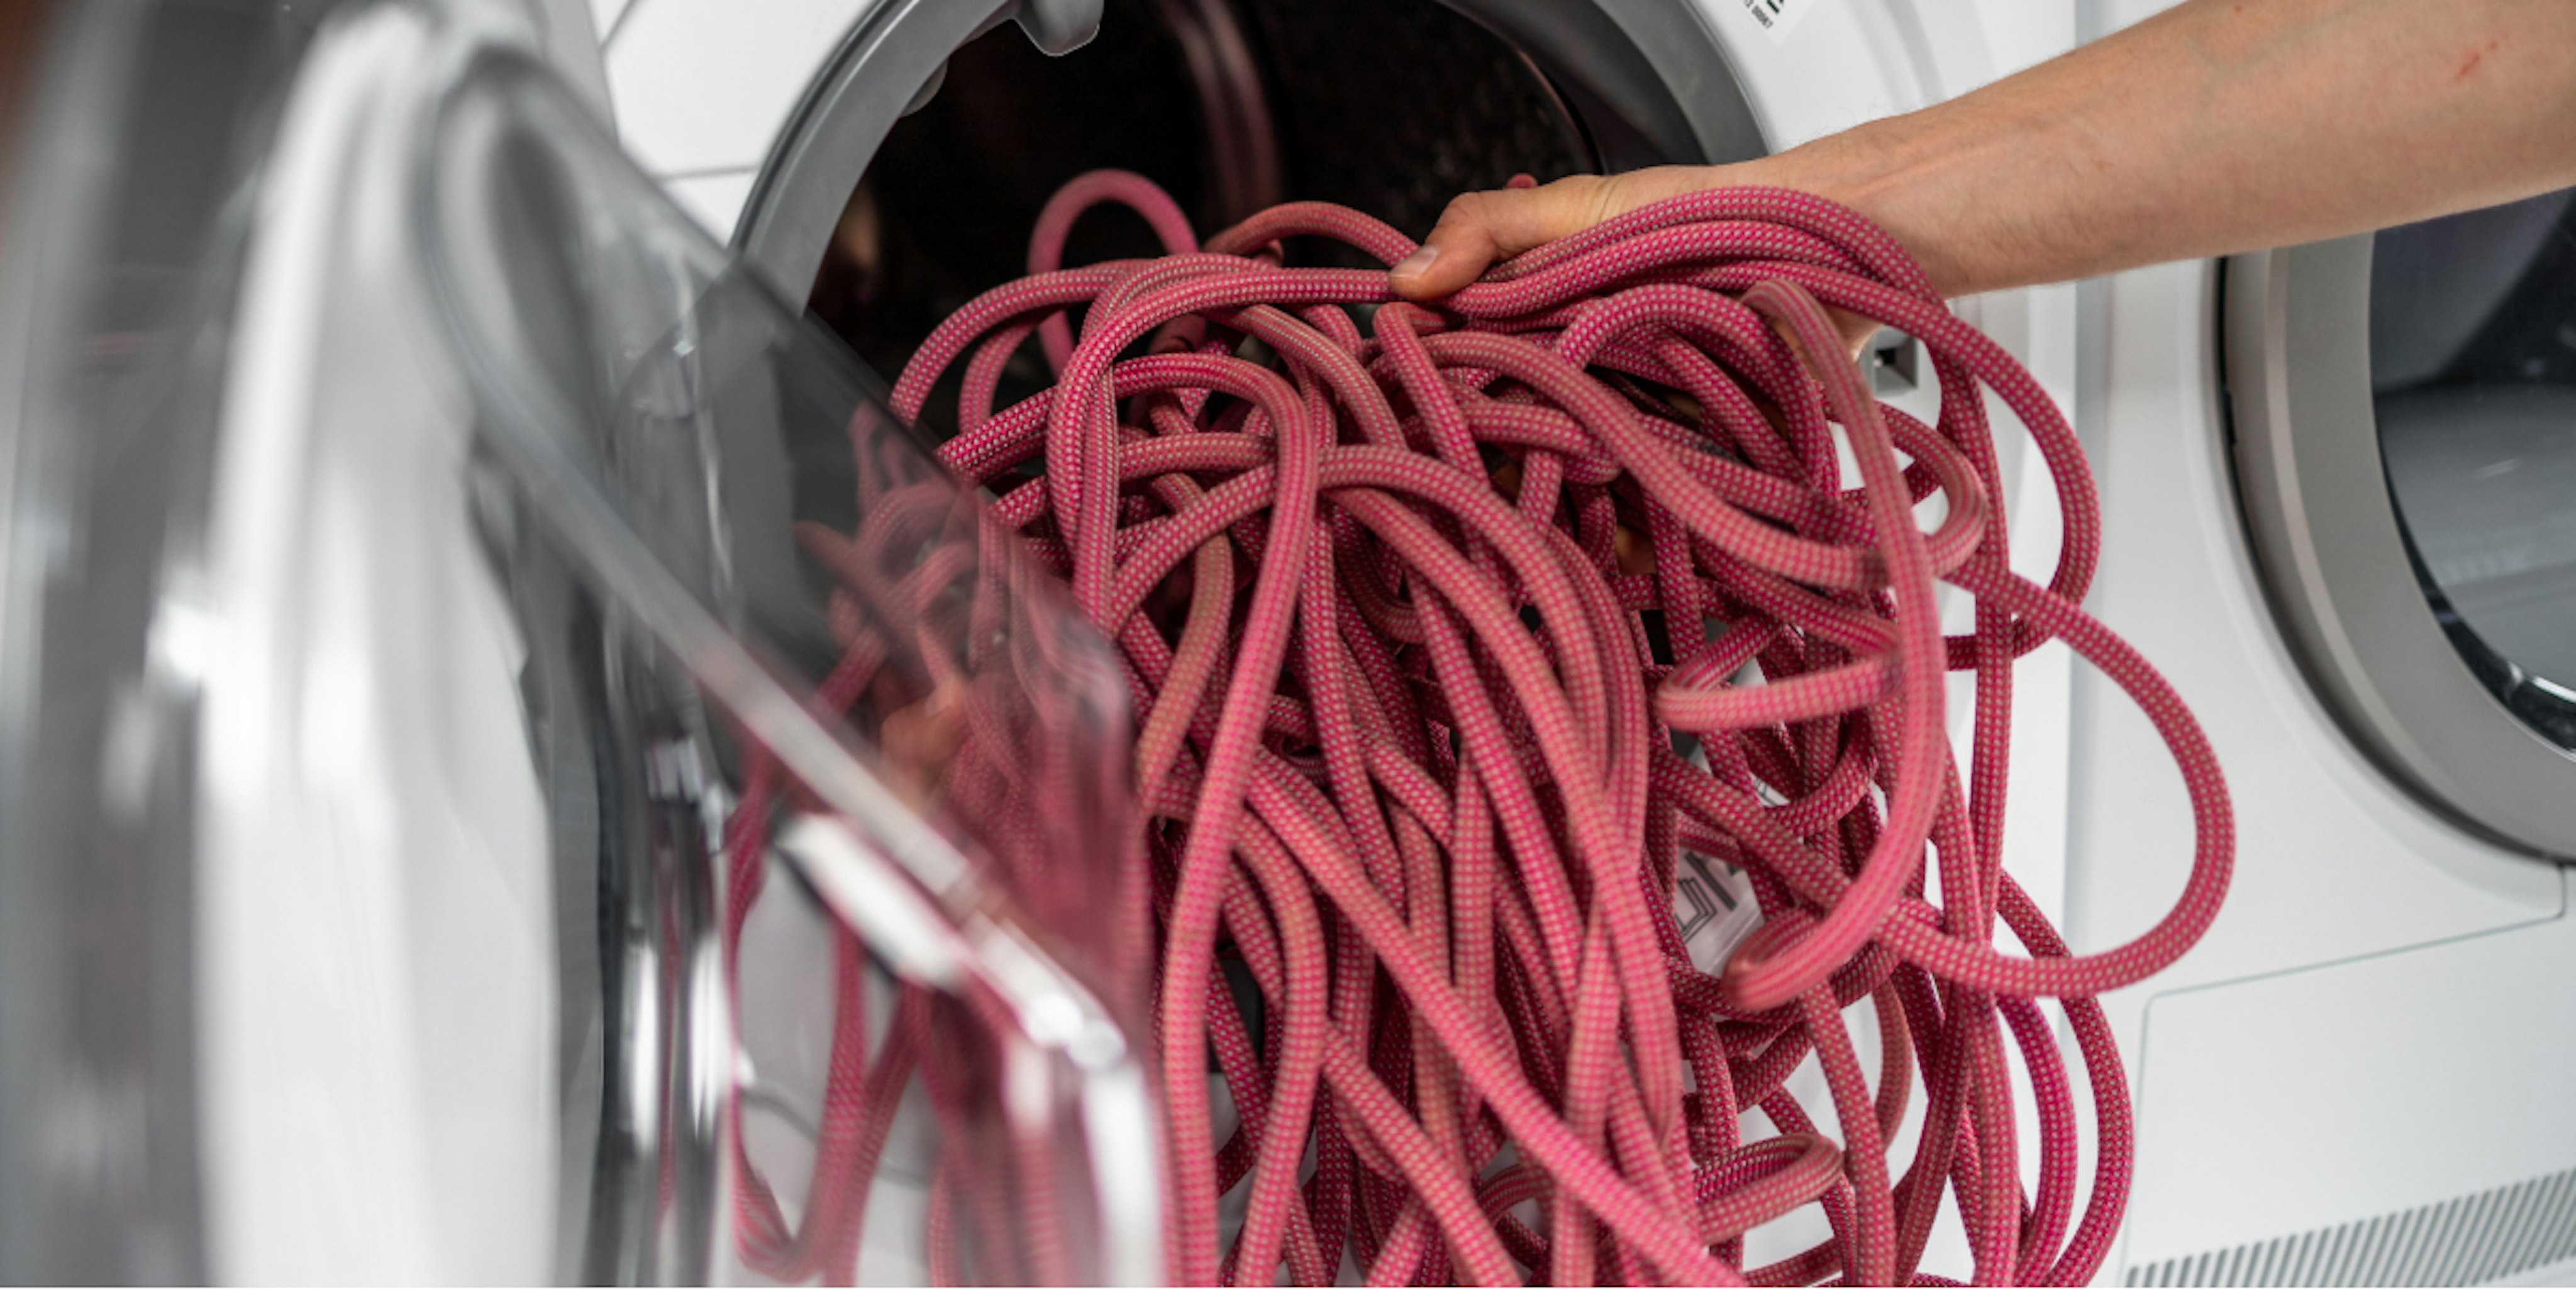
Having a clean rope not only helps the rope last a lot longer and function better, but it also just feels, looks and is nicer to use when clean. With that said, washing a rope couldn’t be easier thanks to the simple fact that yes: ropes can be machine washed.
3.1 Clean rope by hand first
Before you do throw your rope straight into the washer, we recommend taking a moment and running the rope through your hand to scrape off any dried dirt, grass etc. You’ll be amazed at some of the things your rope can pick up, plus your washing machine will thank you in the long run.
3.2 Put into the washing machine
Now you can throw the rope into the washing machine with a mild detergent (eco is recommended) and set it to wash at 30°C (cold wash 65–85F) with a program for “wool garments” if available.
Note: You can wash your rope by hand in the bathtub or sink, however machine washing a quality rope is easier and perfectly fine.
3.3 Lay to dry in a cool place
Once washed, lay the rope to dry in a cool place – never hang it up to dry or leave it in the sun or on a heater and NEVER tumble dry it as all these drying methods can affect the elasticity of the rope. Air drying in a washroom on a towel or tarp is the best way to dry your rope, and once it is dry, see below on how to properly store it ready to then use.
Most of your ropes’ lives will be spent in storage – unless you work with them professionally or just love to adventure. This is why remember these few important tips for storing your ropes can help make them last for years even with regular use.
Use a rope bag
Ropes should always be stored in a rope bag as this helps protect the rope from possible contact with chemicals, unnecessary moisture or things that could cut or get stuck on the rope that could damage it in some way.
Store ropes when dry
The second thing to remember when storing ropes is to do so when they’re dry. If wet, a better option is to leave the rope bag open so that the rope can ventilate until it is dry, and to store the bag itself in a cool place away from unnecessary heat.
Never store in your car
The main mistake people make – especially frequent climbers – is keeping their rope bag in their car. Aside from potential exposure to a spare car battery (see PART 1 for more on acid), temperatures can vary greatly in a trunk or backseat. This makes for a less than ideal spot to store your rope compared to a garage or washroom which have more consistent temperatures year-round.
Note: Make it a habit to take your rope out of your car regularly and see how much longer it can last. Watch the video to learn how to properly coil your rope for storage.
Use a tarp when climbing and preparing
Finally, when using your rope in the wild, be sure to lay a tarp on the ground and the rope on top of it to stop it picking up unnecessarily dirt, sticks and the like, which can contribute to wear and tear. These small elements can have a big effect over time, so better to be prepared by setting up your space before your climb.

A few general rules should also help you know the state of your rope and what to do:
Exposure to acid, which can happen if it is stored next to a car battery for instance, is one reason to replace a rope. Damage from the acid is invisible, so best is to use a rope bag for storage and a new rope should it come in storage contact with larger batteries (such as in the boot of a car).
If you are climbing and you have a rope fall above factor 1.0, then your rope is compromised. Ropes are built and tested to be able to withstand up to five times factor 1.7 falls, but if your rope is older or worn out then this may not be the case.
Finally, sharp edges are the quickest way to end a rope – natural enemies if you will. So, when using your ropes, try and avoid sharp edges when rappelling, with longer quickdraws to reduce drag and allowing the rope to run smoothly.
Following these guides when it comes to ropes can not only ensure your rope works as best as it can, but also that it lasts as long as possible - definitely worth the time and effort for this important piece of gear.